Learn About Outdoor Cannabis Cultivation with 48North
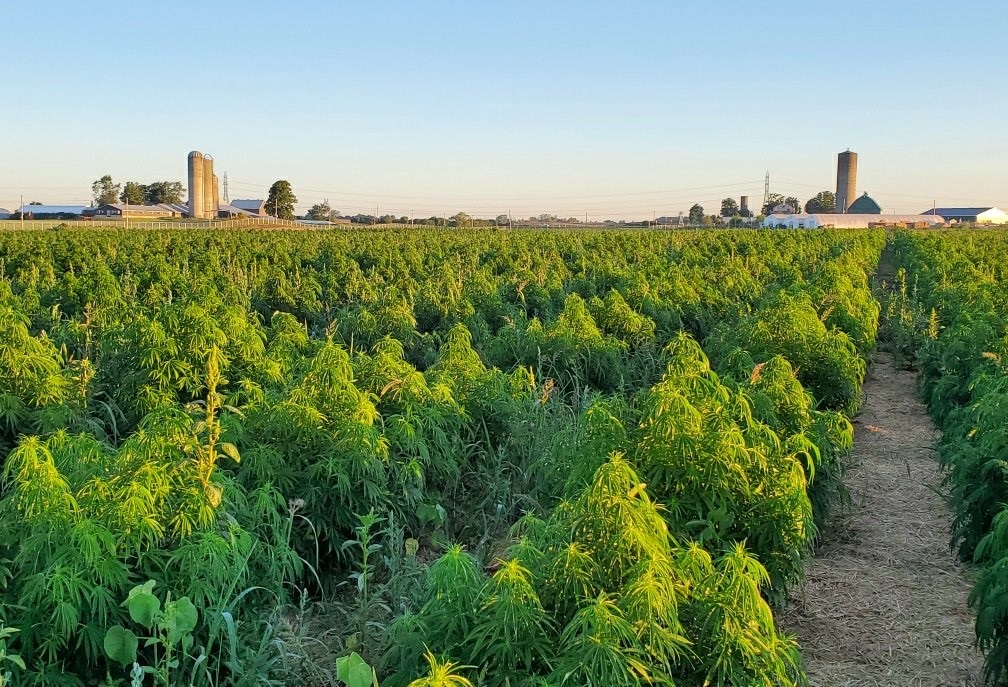
48North opened its Good Farm in Brant County, Ontario, in 2018. The farm has 4.3 million square feet of fields dedicated to growing cannabis in harmony with the local ecosystem.
“When you farm outdoors, you’re subject to the weather. We learned many lessons from our first year in operation.” - Neil Gallant, Vice-President, Cannabis Operations at 48North

Step 1 – Select the strains
Each company has a gene bank in which they keep their best cultivars (commonly called strains). Time required: creating a gene bank can take months, even years.
Choice of cultivar is based on resistance to outdoor conditions, which are harsher than the controlled conditions found indoors and in greenhouses. The 48North team is currently growing four strains, including Green Crush, at its Good Farm.
Step 2 – Grow the mother plants
Time required: about 6 months
Whatever the production type, seeds of the strains considered most promising (due to their resistance to poor weather conditions or popularity with users) are planted. These become the mother plants.
Step 3 – Take cuttings of the mother plants
Time required: 1 day
Mother plants are plants from which cuttings can be taken. The room in which the mother plants is grown is usually called the propagation room. Once the mother plants reach maturity, they can be kept going for a few months. A new set of mother plants is always being grown to replace the preceding generation. A mother plant typically produces 200 to 400 cuttings.
Step 4 – Grow the cuttings
Time required: about 4 weeks
For outdoor cultivation, the vegetative phase starts in a covered wall-less structure so the plants can acclimatize to the outdoor environment. The plants are grown in peat pellets, not pots.
Step 5 – Transplant the young plants
When about 1 foot tall, the plants are planted in the ground in a field. Outdoor cultivation usually requires much more space than indoor cultivation. Transplanting is done by a machine that can handle up to 17,000 plants an hour.
Step 6 – Flower the plants
Time required: 8 to 12 weeks, depending on the strain
Plants risk exposure to all kinds of conditions (intense rain, drought, etc.) during the flowering stage. The team has planted a wide variety of flowers and trees nearby to create an ecosystem that supports cannabis cultivation.
Step 7 – Harvest the plants
Time required: 1 to 5 days, depending on the size of the harvest
With outdoor cultivation, harvests are less frequent but much bigger. Harvesting is in two phases. About 25 full-time and 25 to 50 part-time employees are involved. The top part of the plant – the flower tops – are harvested first for use in making the highest quality products. Then the rest of the plant is harvested for making derivative products, like oils and solvent-free extracts.
Step 8 – Dry the plants
Time required: about 1 week
Drying takes 10 to 14 days and is done in a six-room building.
Step 9 – Trim the plants
Time required: about 5 days, depending on the size of the harvest
The first phase of trimming is done mechanically using a machine called a Mobius trimmer. Employees then take over to check and further improve the quality of the final product.
Step 10 – Have the harvest tested by a laboratory
Time required: two to four weeks
Producers are required by law to send a certain quantity of each batch they produce to an independent Health Canada-certified laboratory for testing.
The analyses accurately detect the presence of even trace amounts of pesticides, bacteria, mould, residual solvents, mycotoxins and heavy metals, including lead, arsenic, mercury and cadmium. The product’s concentration of cannabinoids (THC, CBD, etc.), moisture content and terpene profile are also determined. For more information on this, click here.
A producer that destroys a batch declared unfit for use by the laboratory must do so in the presence of a person who holds a government-issued security clearance. The process must be filmed and two witnesses have to sign a document attesting that the batch was indeed destroyed.
Step 11 – Package the products
Time required: a few days
The dried cannabis is taken to 48North’s transformation facility a few miles from the farm to be packaged manually by employees. A work shift can output 5,000 to 6,000 3.5-gram containers.
Step 12 – Affix the excise tax stamps
Once the product is packaged, the employees have to stick an excise tax stamp over the opening of the container or secondary packaging (if any). Producers purchase the stamps from the federal government, which transfers part of the sums collected to the provinces where the products are sold. To buy stamps, producers must hold a licence granted only to producers licensed by Health Canada. Several other security measures are mandatory for cannabis producers. These include producing a detailed daily production report.
Step 13 – Deliver the products to the SQDC
Producers are responsible for delivering their products to all the SQDC stores that carry them.
